Thursday, May 23, 2013

Brined Pork Chops


Do you smell it? Each evening, the aroma of grills cooking delicious things wafts through the windows of our van as I ride along for the first few stops on the Picky Eater’s courier route. To me, those tantalizing smells are the true signal that summer is fast approaching.


Unfortunately, we live in a downtown apartment with no outdoor space. Any grilling I do is inside on the
George Foreman grill, but I keep stopping in stores to stare at the cast iron grill pans. I see one coming to my kitchen in the near future. (This picture is part of the scenery we see on the route. Isn't Kansas beautiful!)


I've read for some time about how brining is a good way to prepare meat for the grill, especially pork. The salt in the brine not only helps to draw flavors into the meat, but it also keeps the moisture inside as the meat cooks.


I found this recipe for brined pork chops in Taste of the Midwest by Dan Kaercher. The seasonings were perfect for pork. Since I was using bone-in chops, I decided to fry them in a cast iron skillet instead of cooking on the Foreman grill.

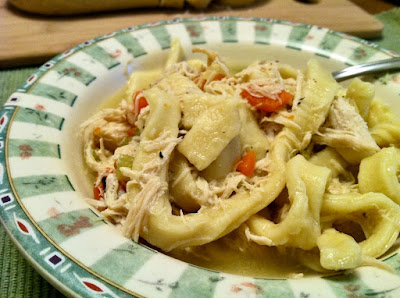
The chops were delicious. Even the Picky Eater loved them, asking, “Can we have these again?”

You bet we will!

One tip about this recipe: Be sure to use kosher salt. Regular table salt will make the chops too salty to eat.  Also, don’t brine the chops for more than 4 hours, for the same reason.


Brined Pork Chops
Adapted from Taste of the Midwest by Dan Kaercher

8 cups water
1/2 cup kosher salt
1/4 cup packed dark brown sugar
1 1/2 teaspoons whole coriander seeds, coarsely crushed
1 1/2 teaspoons whole cloves, coarsely crushed
1 1/2 teaspoons whole allspice, coarsely crushed
1 1/2 teaspoons whole black peppercorns, coarsely crushed
3 bay leaves
4 bone-in pork chops, about 1-inch thick
Flour, for dusting
2 to 3 teaspoons oil, for frying

To make the brine: Combine the water, kosher salt, brown sugar and spices in a large saucepan. (I crushed the spices with my meat mallet, but you can also use the bottom of a saucepan or small skillet. Just push until you hear the spices crack.) Stir over medium-high heat until the mixture comes almost to a boil and the salt and sugar are dissolved. Cool the mixture to room temperature, and then cover and place in the refrigerator to chill, at least 2 hours.

To make the chops: Put the pork chops into the brine solution. Cover and place back into the refrigerator to chill for 2 to 4 hours. (Do not go over 4 hours.) Make sure the brine completely covers the meat. (You can do this in a zippered plastic bag or a bowl.)

Remove the chops from the brine and pat dry with paper towels. Allow the chop to sit out for 30 minutes to come to room temperature.

Place the oil in a skillet (I used cast iron) and preheat over medium heat. Dip the chops into flour to coat, making sure to shake off any excess. Place in the skillet and cook for 7 to 10 minutes per side, or until the internal temperature reaches 160 degrees.

To grill, preheat the grill. Reduce the grill to medium heat and cook the chops over indirect heat. (The burners under the chops are off, but the ones to the side are on.) Cover the grill and cook for 35 to 40 minutes, turning the chops halfway through the cooking time.  

Tuesday, May 14, 2013

Angel Food Cake for Mother's Day


I was excited when Mom requested an angel food cake for Mother’s Day. (It doesn't take a lot to make a food writer happy!) She had given me a 10-inch tube pan last year, and while I’d used it for a couple of recipes, I’d always wanted to try an angel food cake.

Now the cake is this summer’s go-to dessert!


For some reason, I thought angel food cakes were hard to make. Silly me! They’re not difficult at all, as long as you keep a few pointers in mind.

First, if you don’t have a tube pan with a removable bottom, I suggest you get one. Since angel food cakes must be baked in an ungreased pan so the cake can cling to the sides as it rises, a removable bottom will save you a lot of headaches when it comes time to take the cake out of the pan. However, if you don’t have one, don’t let that stop you. Just line the bottom with parchment paper before you add the batter.

The key to a great angel food cake is in how you whip the egg whites—soft and fluffy, but not stiff.  The cream of tarter in the recipe will help stabilize the egg whites, making your job a bit easier. Also, have the whites at almost room temperature (60 to 70 degrees) before whipping.

Another key is to cool the cake upside down. Some tube pans have little metal “feet” to hold them up, but you can also invert the pan and prop it on the neck of a bottle or an inverted funnel while the cake cool. Just don’t try to remove the cake from the pan for at least 1 1/2 hours.   

This angel food cake turned out light, moist, and delicious! However, it did look a little lopsided thanks to one side getting a bit squished during the trip from Kansas to Missouri. We topped each piece with sliced strawberries in sugar (the frozen kind found at the grocery store, per Mom’s request) and fresh whipped cream. (Here's Mom with her cake. I did see her munching on a plain, hand-held slice, too. Why not? It was her day!)


The best thing about this cake, besides being fat-free, is the variety of toppings you can serve with it. Fruits, flavored glazes, frosting…just use your imagination.

Next time, the only thing I would change, besides squishing the cake in transport, will be to add the optional almond extract. Mom noticed it was missing. Now I have an excuse to make it again…and again…and again.


Angel Cake
Adapted from Joy of Cooking by Irma S. Rombauer, Marion Rombauer Becker and Ethan Becker

1 cup sifted cake flour (sift the flour before you measure)
1 1/2 cup sugar, divided
1/2 teaspoon salt
1 1/2 cups egg whites (between 10 and 12 eggs, depending on the size)
1 tablespoon water
1 tablespoon fresh lemon juice
1 teaspoon cream of tartar
1 teaspoon vanilla
1/4 teaspoon almond extract (optional)

Separate you egg whites and set aside so they come to room temperature (between 60 and 70 degrees.)

Preheat the oven to 350 degrees F. Have at the ready a 10-inch ungreased tube pan. If your pan doesn't have a removable bottom, line the bottom with parchment paper.

Sift together the cake flour, 3/4 cup sugar, and salt, three times. (Yes, three times! You want everything light and airy.) Set aside.

In the bowl of a stand mixer, or a large bowl if you’re using a hand mixer, place the egg whites, water, lemon
juice , cream of tarter and flavorings. Beat on low speed for 1 minute to combine, and then increase the speed to medium high and beat until the mixture is a foam that holds a soft shape when you lift the beaters and has increased in volume 4 to 5 times, which takes about 3 to 5 minutes. (Mine took 4 minutes.)

Continue to beat on medium-high speed while adding the remaining 3/4 cup of sugar, one tablespoon at a time, for 2 to 3 minutes. At this point the mixture should hold soft, glossy peaks that bend over at the top when you left out the beaters. (Do not beat until stiff!) You want a mixture that holds a shape but can still be poured into a cake pan.

Remove the bowl from the stand mixer. Sift a fine layer of the flour mixture, 1/4 cup at a time, over the top of the egg mixture. Using a rubber spatula, gently fold in the flour until it is just combined. Continue to gently add the flour 1/4 cup at a time until it is all incorporated. Don’t stir or mix the batter…just keep folding until there are no traces of the flour left.

Pour the batter into the tube pan. Spread the top gently to level, and then run a thin metal spatula through the batter to release any large air bubbles. Bake until a cake tester inserted into the center comes out clean, about 35 to 40 minutes. (Mine took 35.)

Remove the cake pan from the oven and cool the cake in the pan, upside down, for 1 1/2 hours to keep the cake from collapsing. Some pans have little metal feet to hold it upside down, but if not, just place the center of the tube pan onto the neck of a bottle or an upside down funnel to hold the cake while it cools.

To remove the cake from the pan, slide a thin knife between the cake and the pan to help it release, both the outside edge and the inner tube. With a removable bottom, you should now be able to lift the cake out of the pan. Then just slide the knife between the cake and the bottom to remove completely. (If the tube pan doesn't have a removable bottom, just turn the pan over and gently tap until the cake comes out.)

Allow the cake to cool completely before wrapping or frosting. If stored in an air-tight container (or wrapped in plastic wrap) the cake should stay moist and fresh for 2 to 3 days. When serving, cut the cake with a serrated knife in a gentle sawing motion.   

Thursday, May 9, 2013

Minute Steaks and Skillet-Roasted Chicken for Two


Have you ever watched “America’s Test Kitchen” on PBS? I've been a fan for years. Filmed in a 2,500-square-foot-kitchen in Cambridge, Massachusetts, this is where the delicious recipes for Cook’s Illustrated and Cook’s Country magazines are created, as well as the ones for the television program.


What I love about this television show and the magazines is how the folks in the test kitchen try out every imaginable recipe for a dish until they develop what they feel is the perfect one. They also test kitchen equipment and ingredients to find the best taste, performance, and value. Since the magazines do not contain advertising, I feel secure that I'm getting an honest opinion.


For a food writer, the Test Kitchen’s efforts are priceless. While I will test different ways to create a recipe, their work often points me in the right direction and saves me a lot of time. Sometimes I think their final recipe is a little too complicated, but not often. And I may change ingredients or steps from time to time, but their basic ideas offer a sound foundation from where to start.


Recently, I was thrilled to receive the America’s Test Kitchen book Cooking for Two 2013. It’s perfect for my household, which consists of The Picky Eater and me. Plus, each recipe includes the detailed explanation as to how it was created. I immediately started flagging recipes to try.


Here are the first two, both of which were hits in our house:


First, I made the Weeknight Roast Chicken, which is done in a skillet and only takes an hour! Instead of making the sauce in the recipe, I made gravy in the skillet.


I loved it! The meat was moist and the skin nicely browned. The Picky Eater liked it, but he wanted the meat to be more fall-off-the-bone. Oh well, I guess I’ll have to try it again!


Next, I made the Minute Steaks with Garlic-Parsley Butter…except mine had garlic-rosemary butter since I was out of fresh parsley. 

The recipe called for spreading the just-cooked steaks with a compound butter, but instead I melted the compound butter in the still-hot skillet to get any left behind steak flavor and cook the garlic just a bit. Since the Picky Eater doesn't like garlic, I left his steak plain and he topped it with his favorite sauce—ketchup. I, however, happily poured the melted butter over my serving.

We both loved this one! The Picky Eater has already requested we have it again. (He said, “I give it three thumbs up and I only have two thumbs!” Sometimes he can be a little silly, but he’s cute.)

I can’t wait to try more recipes in this cookbook. I’m just getting started!

Weeknight Roast Chicken
Adapted from Cooking for Two 2013 by the Editors of America’s Test Kitchen

1 tablespoon kosher salt
1/2 teaspoon pepper
1 (3- to 3 1/2-pound) whole chicken, giblets removed
1 tablespoon olive oil

Place a 12-inch oven-safe skillet (I used cast iron) into the oven on a rack place in the middle position. Preheat the oven to 450 degrees F.

In a small dish, mix together the salt and pepper. Dry the chicken with paper towels, and then rub the entire bird with olive oil. Next rub the salt/pepper mixture all over the chicken. Tie the legs together with kitchen string and tuck the wing tips under the back.

When the oven and skillet are preheated, place the chicken into the skillet. Roast in the oven for 25 to 35 minutes, or until the breast meat reaches 120 degrees and the thighs reach 135 degrees. Turn the oven off—yes, you turn off the oven!—leaving the chicken inside for another 25 to 35 minutes, until the breast reaches 160 degrees and the thighs reach 175 degrees. Remove the chicken to a cutting board and allow to rest for 20 minutes before carving.

Minute Steaks with Garlic-Rosemary Butter
Adapted from Cooking for Two 2013 by the Editors of America’s Test Kitchen

2 tablespoons unsalted butter, softened
1/4 teaspoon dried ground rosemary or 3/4 teaspoon minced fresh rosemary
1 small garlic clove, minced
1/2 teaspoon Worcestershire sauce
Salt and pepper
1/2 cup all-purpose flour
2 (6-ounce) cubed steaks
2 tablespoons oil

In a small dish, mix together the butter, rosemary, garlic and Worcestershire sauce until combined. Set aside.

Place the flour into a shallow dish. Pour the oil into a 12-inch non-stick skillet (I used cast iron) and heat over medium-high heat until the oil just begins to smoke. Pat the steaks dry with paper towels, season with salt and pepper, and then coat with the flour, being sure to shake off the excess.

Fry the steaks on one side until they reach a deep brown, about 3 minutes. Turn the steaks and continue to cook for an additional 1 to 3 minutes. Remove the steaks to serving plates.

Turn off the heat under the skillet and pour any excess fat. Add the butter to the skillet and cook until just melted, scraping any steak bits off the bottom. Pour the melted butter over the steaks and serve. 

Monday, April 29, 2013

Mystery Cuisine: Pink Lemonade Cookies


In the past, I've written blog posts about my love of cozy mysteries that also include recipes. (See these posts for Wanmansita Casserole and Simply Crackers Candy.)


One of my favorite authors, Joanne Fluke, has a new Hannah Swensen Mystery out titled Red Velvet Cupcake Murder. In the book, I came across a recipe for Tickled Pink Lemonade Cookies that I immediately knew I’d have to try!


These cookies are made with frozen pink lemonade concentrate, though you can use regular lemonade concentrate if you can’t find the pink version. I made a couple of adjustments to the recipe to up the lemon flavor in the frosting. 


Also, the cookies were a little too pink for my liking. Next time I’ll use less food color gel so the cookies look more like the lighter pink of the frosting. I may also add some lemon zest to up the lemon flavor more,
but don’t get me wrong. These cookies taste great!

Pink Lemonade Cookies
Adapted from Red Velvet Cupcake Murder by Joanne Fluke
Makes approximately 2 1/2-dozen cookies

For cookies:
1/2 cup unsalted butter, softened
1/2 cup sugar
1/2 teaspoon baking powder
1/4 teaspoon baking soda
1/4 teaspoon salt
1 large egg
1/3 cup frozen pink or regular lemonade concentrate, thawed
Red food coloring or food color gel
1 3/4 cups all-purpose flour, un-sifted (use the scoop and level method*)

For frosting:
2 tablespoons unsalted butter, softened
2 cups powdered sugar
4 teaspoons frozen pink or regular lemonade concentrate, thawed
2 to 4 teaspoons milk
Red food coloring or food color gel

Preheat the oven to 350 degrees F. Line two baking sheets with parchment paper. Set aside.

For the cake: Put the butter and sugar into the bowl of an electric mixer and beat until fluffy. Mix in the
baking powder, baking soda, and salt. Beat in the egg, and then beat in the lemonade concentrate until well combined. Add the food coloring or gel until the cookies reach the desired pink color. (Start with 3 drops of food coloring or 1/4 teaspoon of food color gel, and then add more if you want to darken the color.) Mix in the flour, 1/2 cup at a time, until well combined.

Drop teaspoon-sized dollops of cookie dough onto a parchment-lined baking sheet. Bake for 10 to 12 minutes until the edges are slightly brown. Remove from the oven and cool on the baking sheet for two minutes, and then place the cookies on a wire rack to cool completely.

For the frosting: By hand or with a mixer, beat together the butter and powdered sugar. Mix in the lemonade concentrate. Mix in milk, one teaspoon at a time, until the frosting reaches a spreadable consistency. Add food coloring or gel to get the desired pink color.

Once the cookies are completely cooled, frost each one. Allow the cookies to set until the frosting has hardened. Store in an air-tight container with the cookie layers separated by waxed paper.

*Scoop up the flour into the measuring cup and then level off by swiping a straight edge (like the back of a knife) across the top. The flour should be well packed into the measuring cup.  

Monday, April 22, 2013

Boston Cream Pie


A week ago, my cell phone vibrated in my pocket while I was teaching my preschool class. When I had a moment, I looked at the screen, only to discover the news about a bombs going off at the Boston Marathon. My mouth dropped open in disbelief.


From 1992 to 2009, I lived in the Boston area. I walked the city’s streets enjoying the historic architecture. I visited the wonderful museums numerous times. I ate cannolis in the North End and Italian food on Cambridge Street. I bought books in Harvard Square and sailed on a schooner in Boston Harbor. I cheered for the sports teams and even wrote about the food served at Fenway Park, complete with a behind
the scenes tour.

I was heartbroken that a city I love was going through such pain on a day that traditionally is filled with celebration and holiday revelry.

What do food writers do to cope with sadness? They cook, of course, and then write about it. I wanted to make something to honor Boston, so I decided to make one of my favorite desserts, the Boston Cream Pie. It also happens to be the official dessert of Massachusetts.

This sweet treat is actually a cake, not a pie. It originated at the Parker House Hotel (now the Omni Parker House Hotel) in 1856, though earlier versions have been around since colonial times. The dessert has
three components—two layers of sponge cake filled with a vanilla pastry cream and topped with a chocolate glaze.

A perfect dessert to sooth frazzled nerves and chase away the bad-news blues.

Boston Cream Pie

Adapted from The King Arthur Four Baker’s Companion and CooksIllustrated.com.

Note: Be sure to make the pastry cream first so it can chill while you make the cake and glaze.

For the pastry cream:
1/2 cup cream
1 1/2 cups whole milk
6 large egg yolks
1/2 cup sugar
Pinch of salt
1/4 cup all-purpose flour
4 tablespoons unsalted butter, cold and cut into four pieces
1 1/2 teaspoons vanilla extract

For the cake:
1 1/4 cups all-purpose flour
1/4 cup cornstarch
2 teaspoons baking powder
1 cup sugar
4 tablespoons (1/2 stick) unsalted butter, softened
1/4 teaspoon salt
1 teaspoon almond extract
1 teaspoon vanilla extract
3 tablespoons vegetable oil
3 large eggs
1/2 cup whole milk

For the chocolate glaze:
1/2 cup cream
1 tablespoon light corn syrup
4 1/2 ounces bittersweet chocolate, chopped
Pinch of salt
1/2 teaspoon vanilla extract

To make the pastry cream: In a medium saucepan over medium heat, bring the cream and milk to just a
simmer. While waiting, in a medium bowl, whisk together the yolks, sugar, and salt. Then whisk in the flour until well mixed. Take the milk-cream mixture off the heat and poor 1/2 cup into the egg mixture, whisking all the time, to temper the eggs. Then whisk the egg mixture into the saucepan with the milk-cream mixture.

Place the saucepan back on medium heat and whisk while it thickens for 1 minute. Turn down the heat to medium-low and continue to whisk for 8 more minutes. Then bring the heat back up to medium and whisk until bubbles pop on the surface, about another minute. Remove from the heat and whisk in the butter until it melts and is blended into the mixture. Whisk in the vanilla.

Strain the pastry cream through a fine-mesh strainer over a bowl. Press plastic wrap gently onto the surface of the cream to cover, and then refrigerate until needed.

To make the cake: Preheat the oven to 350 degrees F. Butter a 9-inch cake pan that is at least 2-inches deep. (I used a springform pan.) Place a parchment paper ring in the bottom and butter the paper. Then dust the pan lightly with flour and set aside.

In a medium bowl, whisk together the flour, cornstarch and baking powder. Set aside.

In the bowl of a mixer, blend together the sugar, butter, salt and flavorings until fluffy. Add the oil, and then the eggs, one at a time, and continue to beat until well combined and fluffy. Beat in 1/3 of the flour mixture, then half the milk, another 1/3 of the flour, the rest of the milk, and the rest of the flour. Beat until well combined, about 2 minutes.

Pour the cake batter into the prepared cake pan. Bake for 30 to 40 minutes, until a cake tester comes out clean. Allow the cake to cook in the pan for 15 minutes, and then remove the cake from the pan to a cooling rack to finish cooling.

To make the glaze: Place the cream and corn syrup into a small sauce pan and bring to a boil over medium heat. Remove from the heat, add the chocolate and salt, and stir until the chocolate melts and the glaze is smooth. Stir in the vanilla and set aside. The glaze will remain fluid until needed, just do not refrigerate.

To build the cake: With a large serrated knife, slice the cake in half horizontally. Place the bottom half on a cake place, cut side up. Scoop the pastry cream into the middle and spread out almost to the edge of the cake. Place the top half of the cake, cut side down, on top of the pastry cream. Pour the glaze over the top, allowing it to spill over the edge of the cake and drip down the sides. Refrigerate for a few minutes to set the glaze. Keep refrigerated until ready to serve. 

Tuesday, April 16, 2013

Grandma’s Noodles with Chicken


I've written many times about Mamaw, my mom’s mom, who was a wonderful cook but hated the process. On the flip side is Grandma, my dad’s mom, who loved to cook. She passed that love on to my dad, who also loves to cook, and she's where my cooking gene originated.

If Grandma knew you were coming to visit, she always had something for you to eat, such as cookies, pie, or cake. If she didn't know you were coming, one of the first things she would say was, “Let me make you something to eat.”

Grandma loved feeding people. And since my dad is the oldest of six, there were always a lot of people to feed. This sign that was in her kitchen offers the perfect explanation.

Grandma was a country cook. I remember the tub of lard that sat in her kitchen. Most of the meals featured fried chicken or pork chops…sometimes both…mashed potatoes and pan gravy, and lots of desserts.

But Grandma was best known for her homemade noodles. They were similar to the frozen noodles found in the grocery store, which my research suggests is thanks to her German ancestry. They were a staple at every family meal. To this day family members will close their eyes in reverence at the memory of those delicious noodles cooked in chicken broth. The noodles were coated in so much flour the chicken broth became a thick gravy while they cooked. 
    
 
I watched Grandma make them from time to time, but of course, I never wrote down her recipe. When she died years ago, the recipe went with her. My Aunt Mary told me she had one particular spoon she used to measure the flour, and the only ingredients were flour, eggs, and water.

A few years ago, my sister challenged me to recreate the noodles for Thanksgiving. I did! When I bit into the noodles, all of the memories of Grandma’s kitchen came flooding back.


This time I decided to add chicken and vegetables to the mix to make a complete meal. The Picky Eater liked it, and even ate the leftovers!

I think Grandma would be happy.


Saturday, April 13, 2013

Farmer’s Market Season Begins


I’m thrilled that today marks the opening of my local farmer’s market. I can’t wait to walk around the stalls to scope-out the early season produce (wonder if there will be radishes and snap peas yet?), baked goods, meats, eggs, and crafts, plus jams and honey. Local musicians will preform throughout the market, which gives the day a festive feel, and I usually run into a person or two that I know. Include the food aromas from the many food trucks and stands (I hear a breakfast burrito calling my name!) and it becomes a perfect day. The market's allure is one of the only reasons I’ll get up early on a Saturday morning.


Here are a few tips to make a visit to the local farmer’s market more enjoyable:

  • Bring your own tote bag. Most vendors have plastic bags for your use, but it is much easier to have one large canvas bag to hold your purchases–especially if it can go over your shoulder. Many people bring compact personal grocery carts that fold up nicely in the car, while others bring mini coolers on wheels. As heavy as my tote bag gets, I’m thinking wheels would be a good thing!
  • Put an insulated bag in your tote, or have a cooler ready in the car, to hold perishable purchases.
  • Walk around the whole market first before making a purchase. That way you can see what is available and compare prices. There’s nothing
    worse that buying tomatoes and then finding ones that both look better and are cheaper at another stand. After a couple of visits, you will pick your favorite stands to visit each week.
  • Talk to the vendors! Ask them where and how their produce is grown. Some stands ship in their produce from far away, so you may think your buying local when your not.  Also, ask for recipes. Most are happy to share their expertise.

To find your local farmer’s market, visit the Local Harvest website. There are listings not only for the markets in your state, but also many other locally-grown food spots such as farm stands, community supported agriculture opportunities, restaurants, and more

I’ll be posting farmer’s market-themed recipes throughout the summer, but here are some lovely ones from years past:


Monday, April 8, 2013

Baked Ziti to Fight Hunger


Three to four dollars a day: That is what a person on SNAP (Supplemental Nutrition Assistance Program, also known as food stamps) gets to spend for food each day. Now, take a minute and think about it: $4 to buy food for breakfast, lunch and dinner. Could you do that?


When I first heard that number, I was astounded. As a food writer, I've always supported organizations that work to feed hungry people, mostly by writing about their efforts so the public would become more involved. But when the Great Recession of 2008 cut into my income, I became very much aware of how hard it is to feed yourself well on a tight budget. Still, I managed to squeeze my fair trade, organic coffee and favorite fresh produce into my weekly food budget while buying budget-friendly beans, pasta and eggs to create my meals.

I would never make it on $4 a day. I can’t even begin to imagine trying.


According to Share Our Strength, 48.8 million Americans struggle to have enough nutritious food on a regular basis. Worst of all, many are children—16.2 million. That means 1 in 5 children aren't getting enough to eat. Many are able to get meals at school through free and reduced cost breakfast and lunch programs, but what about when they aren't in school?  

Frankly, it is incomprehensible that in 2013 there are people going hungry in this country.

Today a community of more than 200 food bloggers is raising its collective voice against hunger in the United States. There is a wonderful film out now, A Place at the Table, starring Jeff Bridges, Chef Tom Colicchio, and many others, that explores hunger in this country. You can check out the trailer for the film here, and watch at a theater near you or On Demand through iTunes and Amazon

Please, please, please, take 30 seconds to click on this link and let our government leaders know we will no longer stand for hungry kids in America. I did! At this time of budget cuts, don’t let programs that feed hungry children fall under the knife. 

Let’s make our voices heard!

Now, here’s my favorite budget-friendly meal. This Baked Ziti recipe is adapted from one I saw in the New York Times in 2004. I paid $7.72 for the ingredients. (I had the oregano, onion, and garlic in my pantry.) Since it serves 6, that amount is within the SNAP budget for dinner to feed a family of this size. When I was cash-strapped, I would make up a batch and freeze it in single serving sizes.


Baked Ziti
Adapted from a recipe in the New York Times, November 10, 2004.
Serves 6

1/2 pound Italian sausage
1/2 pound hamburger (I used ground chuck.)
1 large onion, diced
1 tablespoon minced garlic
1 28-ounce can crushed tomatoes in puree
1 teaspoon ground oregano
1 pound ziti or penne
1 2-cup bag grated mozzarella
Oil for cooking
Salt and pepper, to taste

Preheat the oven to 400 degrees F. Turn on a large pot of water to boil. Grease a 9- by 13-inch baking dish and set aside.

If the Italian sausage came in links, squeeze the meat out of the casing so you are left with the ground meat. In a large skillet over medium high heat, brown the sausage and hamburger. Lower the heat to medium and add the onion and garlic. Cook until the onions are translucent and tender. Add the tomatoes and oregano. Simmer on low.  Do not let the sauce become too thick.

While the sauce simmers, add a good amount of salt to the boiling water. Stir in the pasta and cook until it is just tender. Don’t over cook—you want it to still be slightly too hard to eat. Set aside 1 cup of the pasta water and drain the pasta. Toss the pasta with the sauce and 1/2 cup of the mozzarella, adding some of the pasta water if the sauce is too thick. Pour the pasta and sauce into the baking dish. Top with the rest of the mozzarella and bake until the cheese is melted and brown, about 20 minutes.

Wednesday, April 3, 2013

Conquering Pie Crust Phobia


Do you like to make pie crust? No? I once felt the same way. No matter how I tried, my crust would look terrible! So I bought refrigerator crust instead.

Today I have an article in the Topeka Capital-Journal on how I overcame my pie crust phobia. It's full of great tips from Susan Miller, the director of the King Arthur Flour Company’s Baking Education Center. She gave me a lot of wonderful information on how to make delicious and flaky pie crusts.

Perhaps the best advice was to relax! Give yourself time to work (Thanksgiving morning isn't a good time to start!) and don’t worry if the pie crust doesn't look perfect. It will still taste great!


The article features my blueberry pie, made from berries I bought last summer at the local farmer’s market and kept in the freezer. I also wanted to make a cherry pie, but I discovered I didn't have enough frozen cherries from last summer to fill a pie. So instead I put the filling into the middle of a pie crust and pulled up the edges to make a rustic pie. It tasted wonderful, though I'm sure it wouldn't win any beauty contests!

Just follow this link to see the recipes for the pie crust and the blueberry filling. I put the cherry pie filling recipe below. It is for my smaller rustic creation, but feel free to double the amount for a regular 9-inch pie.

Cherry Pie Filling
 
Makes 1 rustic pie

3 cups pitted cherries
1/4 cup sugar
1/8 teaspoon cinnamon
1/4 teaspoon almond extract
Pinch of salt
2 1/2 tablespoons instant tapioca

1 9-inch pie crust
Egg wash (1 egg and 1 tablespoon water, beaten together)

Mix together all of the filling ingredients and allow to stand for 15 minutes.

Roll out your pie crust as if you would place it into a 9-inch pie pan. Place the dough onto a parchment lined baking sheet. (The dough will drape over the sides of the baking sheet.) Spoon the filling into the middle of the circle. (If the filling is runny, drain off the juice before putting it into the crust. Save the juice.)

Fold the edges of the pie crust up and over the pie filling, using egg wash to “glue” the crust folds together. Pour some or all of the saved juice into the filling. Use the egg wash to brush the outside of the crust.

Bake at 425 degrees for 15 minutes, and then lower the oven temperature to 350 degrees and continue to bake until the crust is nicely browned and the filling begins to bubble, about 30 minutes.