This pudding has a delicious tropical flavor combo of coconut, mango, and cardamom, and the slow cooker keeps you from constantly stirring a hot pot on the stove.
Here’s a recipe for those of you who are not ready to let go of summer. Or maybe where you are, summer isn’t prepared to give way to fall, like here in Kansas, where the temperatures are still reaching the 90s.
The inspiration for this Coconut-Mango Rice Pudding came from one I saw in a Hawaii Magazine email. I loved the tropical flavor combo, but not the idea of standing at the stove stirring a hot pot for 40 minutes.
Instead, I broke out the slow cooker, and it worked perfectly!
To serve as a dessert, I topped the pudding with whipped cream. But I also enjoyed it for breakfast with a dollop of plain Greek yogurt. Some chopped macadamia nuts would also taste great sprinkled over the top.
Enjoy this taste of the islands as you say “Aloha” to summer. Then remember to make it again in the chill of winter to warm your soul when you’re dreaming of tropical breezes and waves sliding over the sand.
***Hey, thanks for reading! If you've enjoyed my posts or tried one of my recipes, you can support my writing efforts through Buy Me a Coffee...or tea...or flavored fizzy water. Your donation will be greatly appreciated, especially now as I deal with a chronic autoimmune disease that flared back up again. The button is located on the right-hand side of this page or you can follow the link here. If you can't donate, that's okay, too. Either way, thank you so much for reading my stuff!
One evening, while I was escaping the doom-and-gloom news during the pandemic by streaming a British mystery series (I think it was Shakespeare and Hathaway), my ears perked up when someone was offered a Jammie Dodger. What a cool name! But what is it?
I immediately Googled the term on my phone and discovered it’s a cookie—or biscuit in the U.K. Specifically, it’s a vanilla sandwich cookie filled with raspberry jam. I ordered some from a nearby British goods shop (Brits in Lawrence) and liked them very much, though I will admit the “jam” in the middle was more “gummy” than “jammie.”
Then in a recent email newsletter from The Happy Foodie (put out by Penguin Books in the U.K.), there was a recipe for Jammie Dodger Blondies from the cookbook Finch Bakery by Lauren and Rachel Finch. Of course, I had to make them!
Amazon provided me with the mini Jammie Dodgers called for in the recipe. I followed the Finch version precisely, which involved under baking the blondies. The recipe said to bake “until the edges are golden brown and the middle still wobbles.” Once cooled, the blondies are chilled in the refrigerator for at least 6 hours before serving, I assumed to firm up the middle.
I learned a few lessons from that first try. One, the blondies were more flavorful at room temperature than chilled. By adding 5 minutes to the baking time on my next attempt, the bars cooked through but were not too over-done—no chilling necessary. Also, while the mini Jammie Dodgers on top were cute, they didn’t add to the flavor. Since most of us here in the U.S. don’t keep these cookies in the pantry, I left them off. I also added almond extract to the batter to enhance the white chocolate flavor.
Trust me when I say these blondies are addictive! Mom and I went through a pan in just a few days! The raspberry jam helps to balance the sweetness of the dense, chewy bar.
Raspberry White Chocolate Blondies will fit right in on a holiday dessert table or as a lovely sweet any time of the year.
Have you ever tried a Jammie Dodger? What did you think?
Yield: Makes 15 to 18 squares
Author: Linda Ditch
Raspberry White Chocolate Blondies
A dense, chewy cookie bar with swirls of raspberry jam and filled with white chocolate chips. The recipe was inspired by Jammie Dodger cookies (biscuits) found in the U.K. and a recipe by Lauren and Rachel Finch.
Ingredients
12 tablespoons (1 1/2 sticks) unsalted butter
3 1/2 ounces white chocolate (I use Ghirardelli)
1/2 cup (100 g) granulated sugar
1/2 cup (100 g) packed light brown sugar
2 large eggs
1 large egg yolk
1 1/2 tablespoons golden syrup (or honey)
2 teaspoons pure vanilla extract
1 teaspoon almond extract
2 cups (250 g) all-purpose flour
1 heaped tablespoon (15 g) cornstarch
1/4 teaspoon kosher salt
5 ounces (150 g) white chocolate chips (Again, I use Ghirardelli)
Topping:
5 ounces (150 g) raspberry jam (I used Bonne Maman)
1 3/4 ounces (50 g) white chocolate chips
12-15 mini Jammie Dodgers (optional)
Instructions
Preheat the oven to 350°F. Spray an 8 x 12-inch baking pan with non-stick cooking spray and set aside. (An 11x7-inch pan would work, though you may need to adjust the cooking tip a bit.)
In a small microwave-safe dish, melt the butter and chocolate. (Mine took 60 seconds) Stir together to combine, and then set aside.
In a medium bowl, whisk together the flour, cornstarch, and salt. Set aside.
Pour the granular and brown sugars into a mixer bowl, and then add the melted butter/chocolate combination. Mix at medium speed for about 1 minute until well combined and smooth. In a separate dish, whisk together the eggs and egg yolk, and then add to the mixer, along with the golden syrup (or honey), vanilla, and almond extract, and mix into the sugar mixture at low speed until combined.
With the mixer still at low speed, slowly pour in the flour mixture. Stir in until just combined (don’t over mix), and then mix in the white chocolate chips.
Pour the mixture into the baking dish, spreading it out evenly. Spoon the jam into a piping bag (or plastic zippered bag). Pipe 6 vertical, evenly-spaced lines on top of the batter. Then using the tip of a knife or a skewer, swirl the jam into the top of the batter. Sprinkle the white chocolate chips over the top, and place the mini Jammie Dodgers over the top (if using.)
Bake for 35 minutes, or until the edges are golden brown and the middle seems just set. (The middle may seem slightly underdone.) Place on a rack to cool completely before cutting.
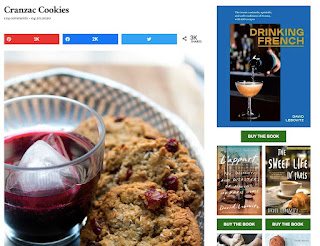
At the beginning of the Covid pandemic, when everything started to close and my fears were at their highest, I discovered two delicious things. The first was the chef and author David Lebovitz live streaming cocktail hour from his Pairs apartment each evening (early afternoon here in Kansas) on Instagram. Soon I was hooked on his posts and stories, especially the ones where he unpacked his purchases after trips to the market, complete with details of what was happening on the Paris streets during the lockdown. As he pulled cheese, apricots, plumbs, lettuces, and herbs from their paper bags, I dreamed of experiencing life and eating like a true Parisian.
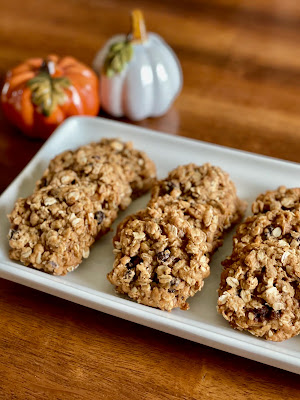
My daily visits to Chef Lebovitz’s posts lead to my second discovery—his recipe for Cranzac Cookies. I love cookies so full of goodness you can justify eating them for breakfast. Oatmeal, coconut, and dried cranberries tossed with flour and dark brown sugar and then held together with a little (for a cookie) melted butter and golden syrup. Lovely!
I’ve lost track of how many times I’ve made these cookies. I also mix things up by using raisins, dried blueberries or dried cherries instead of dried cranberries. Sometimes a mixture of all three. Mini chocolate chips were also an excellent addition.
You can find David Lebovitz’s Cranzac Cookie recipe here.
While I was more than happy with the recipe, I knew many of my friends and family wouldn’t like the coconut. As an experiment, I decided to leave it out and double the amount of oatmeal instead.
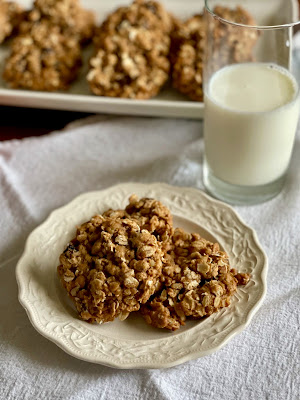
Eureka! The perfect, chewy oatmeal cookie! I went with traditional raisins and added chopped walnuts. I also decreased the amount of brown sugar by 1/4 because the original amount made the cookies a little too sweet for my tastes.
This all-oatmeal version is now my go-to cookie recipe. The ingredients are pantry staples in my house. No mixer is needed, and the dough comes together in minutes. Humm, I wonder how diced dried apple would taste? Or maybe dried apricots and pecans? There are so many possibilities…
Yield: 22 to 24 cookies
Author: Linda Ditch
The Chewiest Oatmeal Cookies
This is an all-oatmeal version of David Lebovitz's Cranzac Cookies. While the recipe calls for raisins and walnuts, you can use any dried fruits and nuts you like.
Ingredients
2 cups (190 g) old-fashioned oatmeal
3/4 cup (185 g) packed dark brown sugar
1 1/4 cup (175 g) all-purpose flour
1/2 teaspoon baking soda
1/4 teaspoon kosher salt
1/2 cup (60 g) raisins
1/2 cup (60 g) chopped walnuts
3 to 6 tablespoons of water
4 tablespoons unsalted butter, melted
1/4 cup golden syrup
Instructions
Preheat the oven to 350 degrees F. Line two baking sheets with parchment paper and set aside.
Place the oatmeal, brown sugar, flour, baking soda, and salt into a large bowl. Mix to combine, breaking up any clumps of sugar. Toss in the raisins and walnuts. Add the melted butter, golden syrup, and 3 tablespoons of water. Stir until combined, adding more water to moisten the dough so it holds together when scooped. (I typically use 5 to 6 tablespoons.)
Scoop out about 1 1/2-inch ball of dough (approximately 2 tablespoons) onto the prepared baking sheets. (I use a spring-loaded cookie scoop that looks like a miniature ice cream version.) Since the cookies don’t spread a lot, I can get 12 on a sheet about 1-inch apart. Then use your hand to flatten each scoop of dough about halfway down.
Bake until the cookies are golden brown, about 14 to 16 minutes, making sure you rotate the pan halfway through baking. Remove from the oven and allow to cool on the pan for 2 to 3 minutes. Then transfer the cookies to a rack to finish cooling. The cookies will keep for 5 to 7 days in an airtight container. (I use a gallon zippered plastic bag.)
Notes:
I use Lyles Golden Syrup, also known as light or golden treacle in the UK. Chef Lebovitz’s original Cranzac Cookie recipe suggests substituting with 2 tablespoons agave nectar, rice syrup, or mild-flavored honey, noting it would change the flavor somewhat. I would go with honey since the consistency is very much like golden syrup. However, you can find golden syrup in the import food section of some grocery stores. I buy mine on Amazon.
Note #2: I measured my dry ingredients with a food scale instead of measuring cups. While I give amounts for both methods, I highly recommend using the scale for the best accuracy. Oxo makes my favorite scale.
While everyone seems to be in a pumpkin frenzy, the early days of autumn are always apple season to me. This is the time when they are picked from the trees, all crisp, sweet and juicy. It’s also when I like to bake all things apple flavored.
Recently I turned to the collection of cookbooks I keep on my kitchen counter in search of a new recipe to try. These books are deemed most important to me versus those stored in the large bookcase in my living room.
My eyes landed on Betty Crocker's Picture Cookbook. It reminded me how life-impacting events happen on ordinary days. And while this particular moment I recalled from the past wasn’t monumental in the typical life-changing ways—awards, birthdays, accidents, love, death—it did lead me towards my love of food and joy of cooking. So much so, the memory of it is crystal clear.
I was in the eighth grade. Do you remember those days? For me, it was a time when I felt less than everyone else, except for my size, which was more than most and kept my confidence in the basement. I had friends, but I spent a lot of time at home reading and watching T.V. Now I realize I’m what Oprah Winfrey describes as an introvert who can act like an extrovert when necessary. In those days, I just felt not good enough.
On this particular day, I was bored. Somehow, I wound up reading through my mom’s copy of the Betty Crocker Picture Cookbook. I knew the basics of cooking and how to read a recipe, but this was the first time I remember falling in love with the pages of a book full of them and making a new-to-me recipe unsupervised.
I made cream puffs. Today, thanks to watching the Great British Baking Show, I realize how difficult it can be to make pâte à choux. On that long-ago day, I followed the directions trusting the strange mixture created in a saucepan would come out right in the end.
It did! Each ball of dough puffed up just like the ones in the picture. I didn’t have the ingredients needed to make the filling, but a box of vanilla pudding in the cupboard did the trick. I dusted the top with confectioner’s sugar and served them for dessert that night.
I will never forget the look on Dad’s face after he took his first bite—total pleasure. Since then, I’ve never feared making pâte à choux, though I honestly have only made it a few times. I prefer treats that are easier to make these days.
The cookbook is still published, updated since its first printing in the 1950s. Honestly, I don’t reach for it much anymore but during my recent time spent turning its pages, the Applesauce Cake recipe caught my eye—simple, homey, and full of autumn flavors. This cake makes a lovely afternoon snack, after-dinner dessert, or even a tasty companion to my morning coffee. (Yes, cake for breakfast!) I tweaked the recipe to fit the ingredients in my pantry—a sign of a good basic recipe.
Join me in celebrating all things apple with this Old-Fashioned Applesauce Cake recipe. And, if you’re curious, the cookbook is still available! Grab a copy and enjoy a step back in time.
Old-fashioned Applesauce Cake
Yield: Makes a 9-inch cake
Author: Linda Ditch
This cake makes a lovely after-school snack, after-dinner dessert, or even a tasty companion to my morning coffee. (Yes, cake for breakfast!)
Ingredients
2 cups cake flour
1 teaspoon baking soda
1 teaspoon kosher salt
1 teaspoon cinnamon
1/4 teaspoon nutmeg
1/4 teaspoon cloves
1/3 cup oil (avocado, canola, or vegetable)
1 1/3 cup granulated sugar
1 large egg
1 cup unsweetened applesauce
1/3 cup water
1/3 cup walnuts, chopped
2/3 cup raisins
Confectioners’ sugar, for garnish
Instructions
Preheat the oven to 350 degrees F. Spray a 9-inch square cake pan with non-stick spray and set aside.
In a medium bowl, whisk together the cake flour, baking soda, salt, and spices. Set aside.
In a large bowl, use a mixer to beat together the sugar and oil. Beat in the egg and then the applesauce. Mix in half the flour-spice mixture, then the water, and then the remaining flour mixture until smooth. Fold in the walnuts and raisins.
Pour the batter into the prepared cake pan and bake for 35 to 40 minutes, or until a cake tester comes out clean. Set on a cooling rack in the pan for 5 minutes, and then remove the cake from the pan onto the rack to finish cooling. Sift confectioners’ sugar over the top for decoration, if desired.
Since first hearing about a lemon drizzle cake on The Great British Baking Show, I’ve wanted to try making one. I love lemon confections with the perfect combination of tart and sweet. While lemon bars are also a favorite, cakes are so much simpler to make.
Or so I thought.
It took me three tries to get this recipe right. I was inspired by one I saw on Instagram made by Irish cookbook author Clodagh McKenna and a traybake version (made as a rectangular cake pan instead of round) by the iconic Mary Berry. Both recipes used the same ingredients and amounts for the actual cake. It was the method of mixing and the drizzle that differed.
For my first attempt, I baked it in the 8-inch cake pan McKenna’s recipe recommended. (Actually, her instructions called for a 20-22 cm round cake tin, which is right around 8 inches.)
Well, I had a disaster on my hands. The sides of my cake pan weren’t high enough, and the batter spilled over into the bottom of the oven. My smoke detectors blared as the lovely lemon batter turned black as I tried to clean it out. What was left in the pan continued to bake, but it sunk in the middle. However, it tasted great!
For the second attempt, I used a 9-inch cake pan. It worked well, except the cake again sunk in the middle. I mean, it sank—to about half the size of the edges.
It looked terrible even though it tasted delicious.
I researched why cakes sink in the middle and came up with two possibilities: One, I opened the oven door too early before the cake could firm up. Though I never looked inside until the timer went off, both cakes seemed to take a long time to firm up in the middle—way past the time noted in the recipes.
The other possibility was too much leavening in the recipe. I wondered if the extra baking powder was too much when using self-rising flour, which also contains baking powder. Maybe the British “self-raising” flour was different than that found in the U.S.? It turns out our self-rising flour actually has less baking powder, plus salt. So, too much leavening probably wasn’t the issue.
Then I saw a couple of recommendations online for using a Bundt pan instead of a cake pan. This type would allow the center of the cake to bake at the same rate as the outside edge.
As you can see, that did the trick!
Lemon juice drizzled over the still-hot cake makes it moist and tart, while the glaze gives it an additional lemon flavor kick.
This cake makes a tasty summer dessert easy to both create and serve at an outdoor gathering. I also plan to enjoy it in the winter, when a lemony treat would brighten a cold, dreary day.
Lemon Drizzle Bundt Cake
Yield: 10 to 12
Author: Linda Ditch
Ingredients
225 grams unsalted butter, softened
225 grams granulated sugar
4 eggs at room temperature
4 tablespoons whole milk
275 grams self-rising flour
2 teaspoons baking powder
Zest of 2 lemons
Juice of 2 lemons
For the glaze:
175 grams confectioner’s sugar
3 tablespoons lemon juice
Lemon zest for garnish
Instructions
Preheat the oven to 350 degrees F. Spray a Bundt pan with non-stick cooking spray and set aside.
In the bowl of a mixer with a paddle attachment, add all of the cake ingredients except for the lemon juice. Beat until well mixed and smooth, starting the mixer slowly so the flour doesn’t fly out everywhere. Spoon the batter into the Bundt pan and gently level the top with a spatula.
Bake for 30 to 35 minutes, or until the cake is lightly browned and a skewer inserted into the cake comes out clean. Allow the cake to cool in the pan on a rack for 10 minutes.
Turn the cake out of the pan onto the cooling rack with a piece of waxed paper or parchment paper placed under the rack to catch any drips. Using a toothpick or skewer, poke holes all over the top of the still-warm cake. Then slowly spoon the lemon juice, a teaspoon at a time, over the top of the cake, so it absorbs into the cake. You will see it soak in. Go slowly, or the juice will just run off the top. A few drips are okay as long as most of the liquid soaks into the cake. Leave the cake to finish cooling on the rack.
Once the cake is cool, whisk together the glaze ingredients until smooth and slowly pour over the top of the cake. You want the glaze thin enough to ooze down the sides of the cake but also thick enough to stay mainly on the cake.
Allow the glaze to firm up slightly, and then move the cake to a serving plate. Garnish with lemon zest.
I am a massive fan of Nigella Lawson. She creates luscious recipes and writings. Not only am I attracted to her recipes, but I also love her no-excuses approach to food. I’ve watched most of her cooking shows. My favorite scenes were her pajama-clad, late-night trips to the refrigerator for a recipe leftover as a snack to end the program.
FYI: Nigella’s new book called Cook, Eat, Repeat: Ingredients, Recipes, and Stories was released on April 20th. She wrote it this past year while spending a lot of time alone during the Covid lockdown in the United Kingdom.
I already have a recipe picked out to try! I can’t wait to dig deeper into the book.
This No-Bake Nutella Cheesecake is from her book Nigellissima. It was our dessert for Easter dinner. Then I enjoyed a piece almost every day in the following week. I love Nutella. It’s such a good spread on a graham cracker, and I use it to make an easy hazelnut latte. In this recipe, the cream cheese provides a tang to balance out the sweetness.
I made one change: Nigella’s original recipe calls for a crust made with digestive biscuits. Since I didn’t have any, I used graham crackers instead. This substitution worked, but it made for a very thick crust. Next time, I’ll give the digestives a try to see if there’s a difference. Don’t get me wrong. The cheesecake tasted great even with a thick crust.
Since I can make this dessert without turning on the oven, this will be my go-to recipe for something sweet this summer.
Yield: 8 to 12
Author: Linda Ditch
No-Bake Nutella Cheesecake
Adapted from a recipe found in Nigellissima by Nigella Lawson. This simple recipe comes together quickly without the aid of an oven.
Ingredients
100 grams hazelnuts, toasted (see note)
250 grams (about 8 to 9 ounces) graham crackers
75 grams (5 tablespoons and 1 teaspoon) soft unsalted butter
400 grams Nutella
500 grams (2 8-ounce packages) room temperature cream cheese
60 grams (1/2 cup) confectioners’ sugar
Instructions
Place the toasted hazelnuts into the bowl of a food processor. Pulse until the nuts are finely chopped. Pour into a small bowl and set aside.
Break up the graham crackers into smaller pieces and place them into the same food processor bowl you used for the nuts (no need to clean). Add in the butter and a rounded tablespoon of the Nutella. Whiz the mixture together until it starts to look like damp sand. Add 3 tablespoons of the chopped hazelnuts, and pulse 3 or so times to mix.
Pour the graham cracker mixture into a 9-inch springform pan. Press the crumbs into the base and slightly up the sides to create a firm, even crust. (I used the back of a small measuring cup to do this.) Put the pan into the refrigerator to chill while you make the filling.
In the bowl of a mixer, add the rest of the Nutella and the cream cheese. Sift the confectioners’ sugar over the top. Beat until the mixture is smooth. Remove the crust from the fridge and pour the filling over the top, spreading into an even layer. Sprinkle the remaining chopped hazelnuts over the top.
Refrigerate the cheesecake for at least 4 hours. Be sure to serve it straight from the fridge for easier cutting and put any leftovers back into the fridge.
Note: To toast the hazelnuts, pour the nuts into a dry skillet and place over medium-low heat. Toss occasionally and toast until golden. I used nuts with the skins already removed, but you can wrap up the hot, toasted skin-on nuts in a clean kitchen towel to steam for 10 minutes and then rub off as much skin as possible.
If you're looking for a dessert that is both easy and delicious, this crustless coconut custard pie is just the ticket. It's adapted from one I found in Marion Cunningham's book Learning to Cook, which was published in 1999.
Let me introduce you to Marion Cunningham, one of the women who helped Americans cook better. A life-long resident of California,
she went from homemaker to cookbook author and columnist. She is perhaps best known for
updating the iconic The Fannie Farmer Cookbook in the 1970s.
However, first and foremost, Marion Cunningham was a
teacher. She made the most clueless cook feel capable of creating a meal to
feed themselves, family, and friends. Learning to Cookprovides step-by-step instructions so there is no question as to how a dish should be made.
Her Cooking with Childrenbook opened the door to life-long cooking. And all of
her cookbooks featured ingredients that can be found in any supermarket.
In the introduction of Learning to Cook, she told about the
experience of teaching Saturday cooking classes to beginners. “Every time we cooked, we sat down around my
dining-room table and looked at the results of our lessons. Cooking in my
kitchen, then enjoying each other’s company over a home-cooked meal, helped
introduce (or re-introduce) these adult beginners to the social pleasures of
cooking and eating together, pleasures that are often missing in busy lives.
They tell me how they learned that going home at the end of the day, after busy
work pressures, to a quiet time of cooking can be the best kind of therapy.
That feeling is one of the best gifts that cooking at home can give us, and I
hope that all of you using these recipe and sitting down to enjoy a meal with
your friends, family, or even alone will find the same kind of satisfaction.”
The ingredients for this Crustless Coconut Custard Pie are quickly whizzed together in a food processor. Serve it dusted with confectioner's sugar and toasted coconut on top, as I have here, or with some whipped cream and berries on the side.
Yield: 6 to 8
Author: Linda Ditch
Crustless Coconut Custard Pie
This recipe was adapted from one found in Learning to Cook with Marion Cunningham. A creamy, refreshing dessert for the perfect ending to any meal.
Ingredients
2 cups milk
1/2 cup all-purpose white flour
1 teaspoon baking powder
1/4 teaspoon salt
4 large eggs
1 cup sugar
1 1/2 teaspoons vanilla
1 cup unsweetened or sweetened packaged coconut, plus more for garnish
Powdered sugar, for garnish
Instructions
Preheat the oven to 350 degrees F. Place the milk, flour, baking powder, salt, eggs, sugar, and vanilla into a food processor and whiz for three minutes. Add the 1 cup coconut and whiz again for 3 seconds.
Pour the mixture into a 9-inch pie pan and bake in the oven for 40 minutes. Check to see if the pie is done by sticking a sharp knife into the center. If it comes out clean, it’s done. If not, bake for an additional 5 minutes and check again. You want there to be a slight wobble when you remove it from the oven. It will firm up as it cools.
Serve at room temperature or cold, cut into wedges. Dust with powdered sugar and sprinkle with toasted coconut if desired. Also nice served with whipped cream and/or fresh fruit.
To toast coconut, sprinkle 1/4 cup coconut onto a baking sheet. Place in the oven and bake until toasted, about 3-5 minutes. Keep an eye on it, since the coconut can burn quickly!